How to Replace a Faucet Without a Plumbing Disaster
Replacing a bathroom faucet is a manageable DIY project when the shutoff valves work, the new faucet matches the sink, and the supply connections are in good condition. The safest sequence is to verify compatibility first, shut off water and confirm it is off, remove the old faucet carefully, install the new hardware to the manufacturer's instructions, then pressure-test every connection before closing the cabinet.
The No-Surprise Faucet Checklist
- Confirm the sink-hole pattern and faucet configuration before purchase.
- Check whether the new faucet includes supply lines, drain hardware, and required gaskets.
- Test the local shutoff valves before disassembly.
- Keep a bucket, towels, adjustable wrench, basin wrench, flashlight, and cleaning supplies within reach.
- Do not force corroded valves or fittings. Stop if a connection begins twisting the pipe behind the wall.
Step 1: Buy a Faucet That Actually Fits
Bathroom sinks may have a single faucet hole, three holes close together for a centerset faucet, or wider-spaced holes for a widespread design. Look under the sink and on the deck before shopping. The visible faucet shape is less important than the mounting pattern, available clearance, drain compatibility, and supply connection.
If water efficiency is a priority, the EPA WaterSense bathroom faucet guidance explains the WaterSense label and certified bathroom-sink faucet options. Style and finish are preferences; fit, certification, and installation requirements are objective product details.
Read the installation manual before opening the tool box. Some faucets use a deck gasket, some call for sealant, and some use a proprietary mounting bracket that changes the order of installation.
Step 2: Test the Shutoffs Before Taking Anything Apart
Clear the cabinet and place towels and a shallow pan below the valves. Close the hot and cold shutoff valves gently, then open the faucet to release pressure and confirm flow stops.
The EPA WaterSense home-maintenance page recommends monitoring faucets and pipe connections for leaks and addressing problems promptly. If a shutoff valve will not close, drips continuously, or begins leaking around the stem when turned, stop the project. The house main may need to be shut off and the valve may need replacement.
Do not rely on the handle position alone. Verify that water has actually stopped before loosening a supply line.
Step 3: Disconnect Supply Lines Carefully
Place the bucket beneath the connection because a small amount of water will remain in the lines. Use one wrench to stabilize the valve or faucet fitting when needed and another to turn the nut. The goal is to loosen the connection without twisting the valve body or pipe.
If the supply lines are old, kinked, corroded, or too short for the new faucet, replace them with connectors that match the valve and faucet sizes. Do not reuse a damaged gasket or force mismatched threads.
This is also a good moment to inspect the cabinet floor for staining, swelling, or old mineral deposits. Active moisture may indicate a leak that deserves attention before the new faucet goes in.
Step 4: Remove the Old Faucet and Drain Hardware
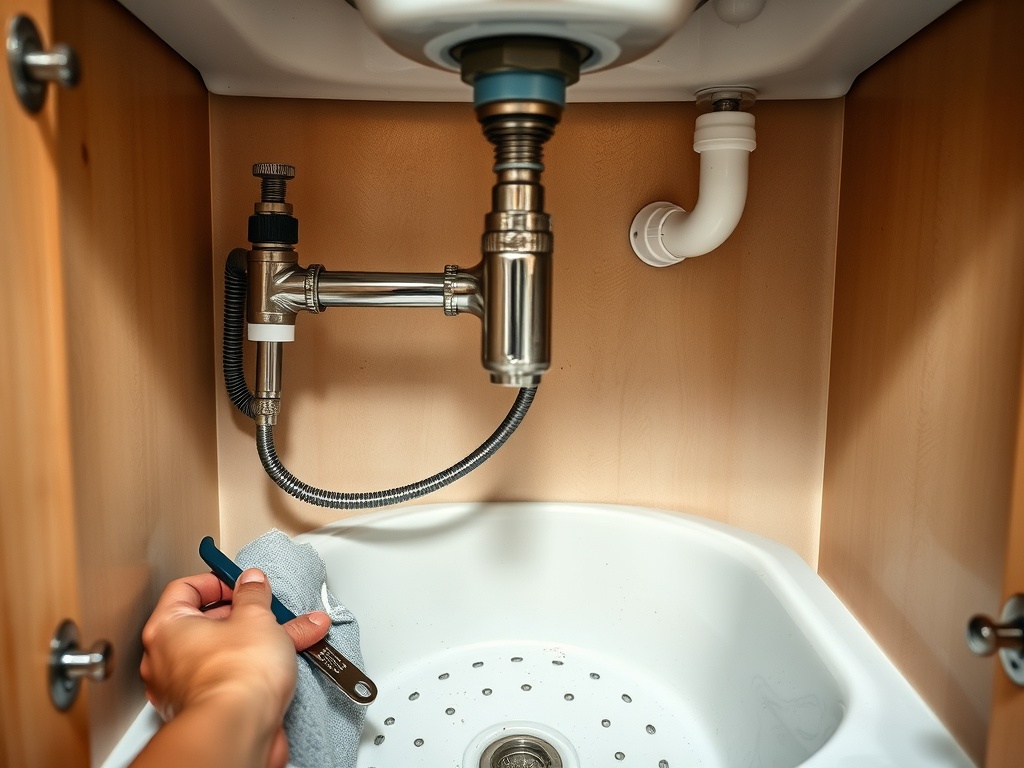
Most faucets are held from below by mounting nuts, clips, or a bracket. A basin wrench can help reach fasteners behind the sink bowl. Support the faucet from above as the last fastener is removed so it does not fall or scrape the sink.
If the new faucet includes a matching pop-up drain, disconnect the old lift rod and trap connection as required by the drain design. Keep a bucket beneath the trap. Drain assemblies differ, so follow the manufacturer's instructions instead of copying the old setup blindly.
Once the faucet is out, scrape away old plumber's putty or sealant without scratching the sink. Clean and dry the mounting surface so the new gasket can seat evenly.
Step 5: Install the New Faucet in the Right Order
Dry-fit the faucet before applying any sealant. Make sure the spout and handles sit square to the basin and that mounting hardware can be reached from below.
Install the gasket, sealant, deck plate, mounting bracket, and nuts exactly as the manual specifies. Tighten evenly. "Tighter" is not always "better"; overtightening can crack some sink materials, deform gaskets, or damage faucet components.
If the faucet has flexible supply tails, route them without sharp bends. If separate supply connectors are used, start threaded connections by hand to avoid cross-threading. Use thread-sealing tape only where the manufacturer or fitting type calls for it; many compression and gasketed connections do not seal on the threads.
Step 6: Reconnect Water and Test in Stages
Before turning water back on, wipe every fitting dry so a new leak is easy to see. Open the shutoff valves slowly. Watch each connection for beads of water.
Then run the faucet, first cold and then hot. Check above the sink for splashing or a loose base and below the sink for supply, drain, and trap leaks. If the aerator can be removed, the manufacturer may recommend flushing the faucet before reinstalling it to clear installation debris.
Dry all connections with a paper towel and check again after several minutes. A slow seep can be difficult to spot on a wet fitting. Recheck later the same day and the next morning.
Troubleshooting Before You Reach for More Force
If a compression connection leaks, shut off the water and inspect whether the connector is correctly seated. Repeatedly tightening a misaligned fitting can damage the nut or valve. If a threaded connection leaks, confirm that the thread type and sealing method are correct before adding tape or compound.
If the drain leaks at the sink opening, the gasket or sealing surface may be misaligned. If it leaks at the trap, make sure the slip-joint washer is oriented correctly and the pipe is not under side pressure.
A faucet that sits loose on the deck usually needs the mounting hardware repositioned or tightened from below. Do not fill the gap with surface caulk as a substitute for a secure mount. For other small sealing jobs around the room, a separate caulking and weatherstripping guide explains where sealant is appropriate.
Know When to Stop the DIY Job
Call a licensed plumber when shutoff valves fail, supply pipes are heavily corroded, connections disappear into a damaged wall, the sink or countertop is cracked, or a leak continues after correct reassembly. Also stop if loosening a fitting causes the pipe behind it to rotate.
A home repair does not have to become a test of persistence. One hour of professional work can be less disruptive than a broken valve and an emergency water shutdown. The broader skill is knowing when a project has moved beyond routine maintenance, just as homeowners must weigh system-level trade-offs when comparing heat pumps and furnaces.
For beginners building confidence, keep the project narrow. Finish the faucet completely, test it, and clean up before starting another home improvement task.
Leave the Cabinet Better Than You Found It
Label the hot and cold shutoffs if they are not obvious, store the faucet manual, and note the model information somewhere accessible without leaving packaging under the sink. Keep the cabinet floor dry and uncluttered enough that future leaks will be visible.
Home improvement information is educational only. Plumbing codes, fixture requirements, water-pressure conditions, and connection types vary; follow the faucet manufacturer's instructions and local requirements, and use a licensed plumber for failed valves, damaged piping, or uncertain connections.
A sensible next step is to photograph the existing faucet from above and below, measure the sink-hole layout, and verify both shutoff valves operate before buying the replacement.