How to Build a Cozy Fire Pit Seating Zone
A good fire pit seating zone starts with safety and circulation, not chair style. Place the fire feature on an appropriate noncombustible surface, follow the manufacturer's clearances and local rules, keep the area away from structures and overhead combustibles, then arrange seating so people can move comfortably without entering the heat or spark zone.
Fire-Side Plan at a Glance
- Check municipal fire rules, burn bans, HOA restrictions, and manufacturer instructions before buying materials.
- The U.S. Fire Administration recommends placing fire pits and outdoor fireplaces at least 10 feet from the home or anything that can burn.
- Use noncombustible surfacing where required and keep overhead branches, fences, cushions, and dry vegetation in mind.
- Plan a clear path in and out before placing chairs.
- Keep children and pets supervised, and fully extinguish the fire before leaving.
Step 1: Choose the Safest Practical Location
Start with a flat area that can support the fire pit and seating without rocking or settling. Look up as well as around: tree limbs, pergola roofs, awnings, eaves, umbrellas, and string-light cables can be more important than the furniture on the ground.
The U.S. Fire Administration outdoor-fire guidance recommends using fire pits at least 10 feet away from the home or anything that can burn. Treat that as a baseline safety recommendation, not permission to ignore a stricter local code or product manual. Some jurisdictions limit open burning, restrict fires during drought or air-quality events, or require greater separation.
Wind is another site factor. Avoid locations where prevailing wind routinely pushes smoke toward doors, open windows, neighboring patios, dry vegetation, or children's play areas. If the property does not have a suitable location, a fire pit may simply be the wrong feature for that yard.
Step 2: Decide What Kind of Fire Feature Fits the Space
Portable propane fire tables, natural-gas fire features, and wood-burning pits create different design and maintenance needs. A gas feature can be convenient and may produce less smoke than wood, while a wood fire provides a traditional experience but requires dry fuel, ash management, and closer attention to smoke and sparks.
The EPA's backyard recreational fire guidance notes that wood smoke contains fine particles and recommends burning only dry, seasoned wood while checking local laws and air-quality conditions. People with asthma, heart or lung disease, older adults, children, and other sensitive individuals may be more affected by smoke.
Choose a unit that is listed or certified as required in your jurisdiction and install it exactly as the manufacturer specifies. Do not improvise a gas connection, change burner media, or build an enclosure around a unit unless the instructions allow it.
Step 3: Build a Stable Noncombustible Base
For an in-ground or built masonry pit, local construction and fire rules determine what materials and dimensions are acceptable. For a portable pit, the product manual governs the surface beneath and around it.
Pavers, concrete, gravel systems, and other noncombustible materials can create a visually defined zone, but drainage and stability still matter. A loose surface that shifts under chair legs can create a trip risk. If you use pavers, build the base correctly so the finished surface stays level rather than settling into dips.
If the seating area is part of a larger landscape redesign, nearby eco-friendly lawn alternatives can reduce awkward strips of turf around the hardscape. Keep combustible mulch and dry plant material away from the fire feature according to local and manufacturer guidance.
Step 4: Arrange Seating Around Real Movement
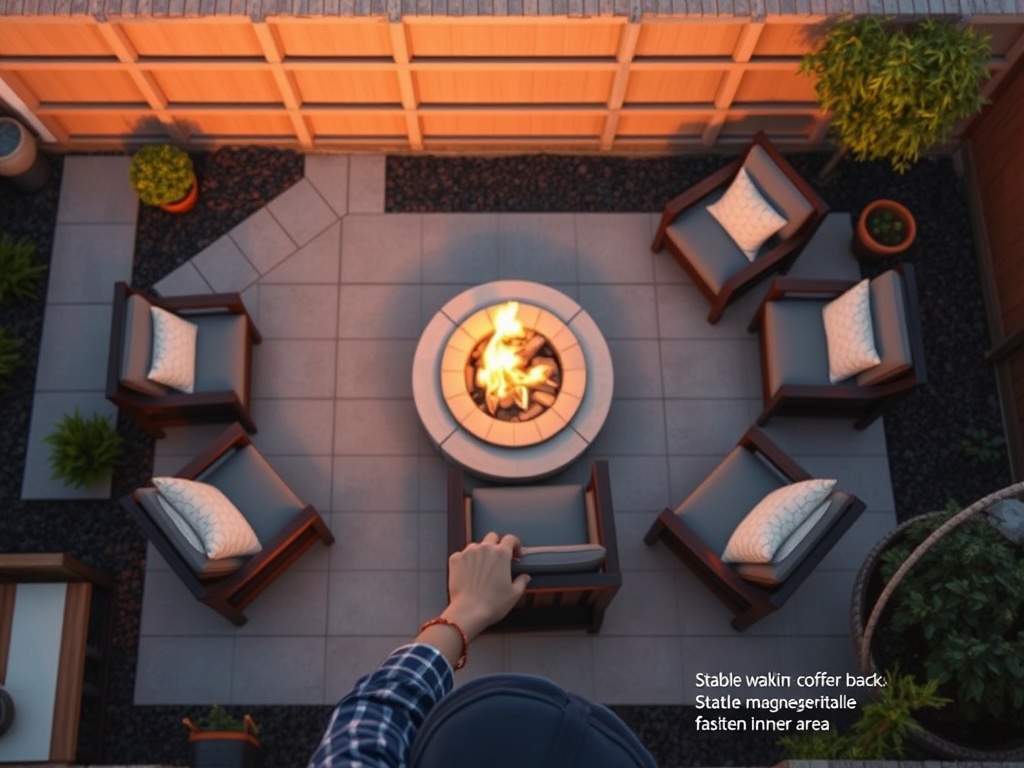
Place the fire pit first, then test chair positions with actual bodies and walking paths. People need room to enter, sit, stand, carry drinks, and step away without squeezing between the fire and another person.
Avoid using a decorative tape-measure rule as a universal seating distance. Fire output varies widely by fuel, burner size, wind, pit height, and chair material. Use the manufacturer's clearance requirements and move seating farther away when radiant heat feels uncomfortable.
A semicircle works well when the zone opens toward a view. A full circle feels social when traffic approaches from several directions. Built-in benches are less flexible than movable chairs. If children use the yard, movable seating can make it easier to maintain a deliberate buffer around the fire.
Step 5: Add Comfort Without Adding Hazards
Use outdoor-rated seating that is stable on the chosen surface. Seat cushions and throws should stay outside the required clearance area and should never be left where sparks can reach them. Storage nearby can keep textiles dry and make cleanup easier, but the box itself must also be located away from heat.
Low side tables are useful because they keep drinks off the ground and reduce people leaning toward the fire. Avoid cluttering the inner ring with planters, stools, lanterns, or decor. Larger planters belong toward the outside edge, where the pot material can be chosen for weight, weather exposure, and stability without creating a heat hazard.
Lighting should help people see paths and changes in level without overpowering the fire. Low-voltage path lighting or shielded downlighting can work well. Electrical installations outdoors must follow applicable electrical code and product ratings, so permanent wiring is a job for a qualified professional where required.
Step 6: Manage Wood, Ash, and Everyday Safety
For wood fires, keep only a small working amount of wood near the seating zone and store the main supply safely away from the pit. Never burn trash, plastic, treated lumber, or construction waste. Use a spark screen when appropriate for the fire pit and local conditions.
Keep an appropriate extinguishing method nearby, such as a garden hose connected and ready where freezing is not an issue, or another method recommended by local fire authorities. Extinguish the fire completely before leaving the area. Ash can retain heat longer than it looks hot, so follow fire-authority guidance for cooling and disposal in a covered metal container on a noncombustible surface.
Children and pets should be closely supervised whenever the fire pit is operating or still hot. Do not rely on a ring of chairs as a safety barrier.
Troubleshooting the Layout Before You Finish
If smoke constantly reaches seated guests, the site may be too sheltered, the wind direction may be wrong, or the fuel may be producing excess smoke. Relocating a portable unit can be more effective than building a taller screen that creates new airflow problems.
If chairs wobble, improve the base before adding decorative stone. If the zone feels cramped, remove furniture rather than shrinking the safety buffer. If the hardscape feels visually bare, add planting to the outer perimeter instead of pushing combustible decor toward the fire.
If plants near the seating area develop stress or foliar disease, review heat exposure, irrigation, and airflow. A recurring issue such as powdery mildew is better handled through proper plant care than by moving diseased foliage closer to the fire or disposing of it by burning.
Finish With a Safety-First Test Night
Before hosting a group, use the space with one or two people. Watch how smoke moves, where people naturally walk, whether lighting is adequate, and whether any chair or table gets uncomfortably hot. That test often reveals layout problems that a plan view misses.
Home and garden information is educational only and does not replace local fire code, building code, manufacturer instructions, air-quality rules, or professional installation advice. Open-burning requirements and safe clearances can vary significantly by jurisdiction and equipment.
A practical next step is to mark the proposed fire location and seating footprint on the ground, verify local rules and product clearances, then adjust the layout before any permanent hardscape is installed.